This guide describes the procedure for upgrading the firmware on the QuecPI platform using Qualcomm Flash Image Loader (QFIL).
Prerequisites
Before starting the firmware upgrade process, ensure the following requirements are met:
Qualcomm USB Driver Installation
Before flashing images for Quectel Pi H1, please ensure that the Qualcomm_USB_Driver_v1.0.10065.1 driver has been installed on the host PC.
If the driver has not been installed, please download and install it before proceeding with the firmware upgrade process.
Download Link: https://developer.quectel.com/doc/files/Qualcomm_USB_Driver_v1.0.10065.1.zip
Important: QFIL will not be able to detect the device in EDL mode if the Qualcomm USB driver is not installed correctly.
Additional Requirements
-
QFIL is installed on the host PC.
-
The latest firmware package has been downloaded.
-
The firmware package has been extracted to a local directory.
-
A USB connection between the host PC and the Quectel Pi H1 is available.
Note: It is recommended to use the latest firmware release available for your platform.
Step 1: Connect the Module and Enter EDL Mode
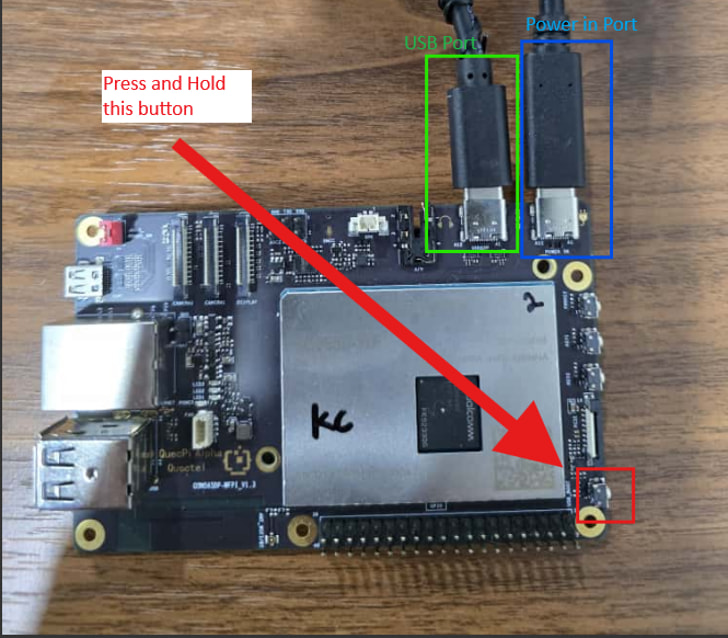
Connect the SG565D-WF board to the power source.
Before powering on the device, press and hold the EDL (Emergency Download Mode) button.
Step 2: Power On the Device
While holding the EDL button, connect the power supply to the board.
Continue holding the button until the module enters EDL mode.
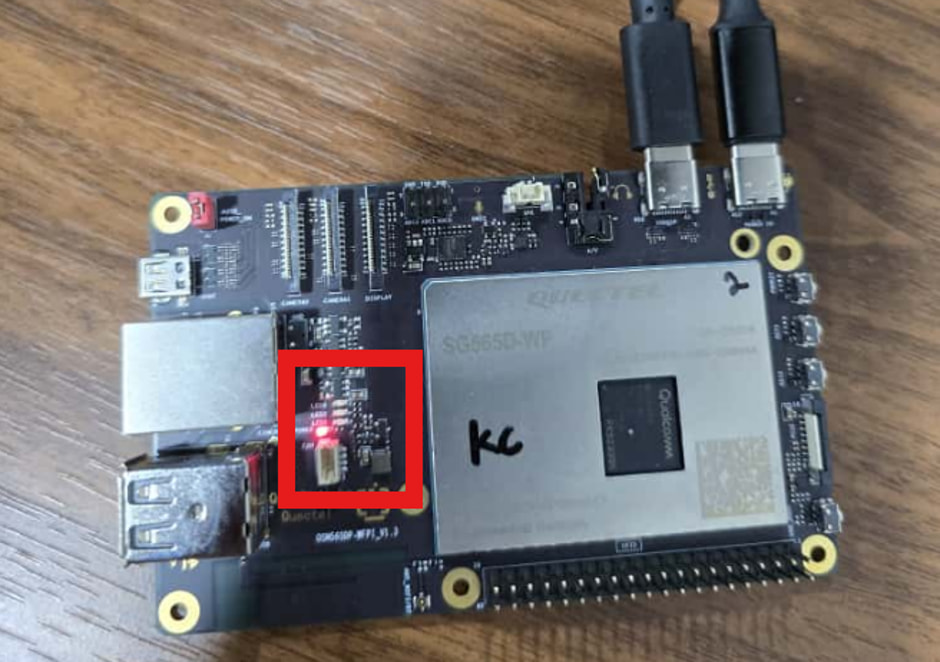
When EDL mode is entered successfully, the board should display only a red LED indicator.
Step 3: Select the Qualcomm Download Port
Launch QFIL.
Select the COM port corresponding to the detected Qualcomm device.
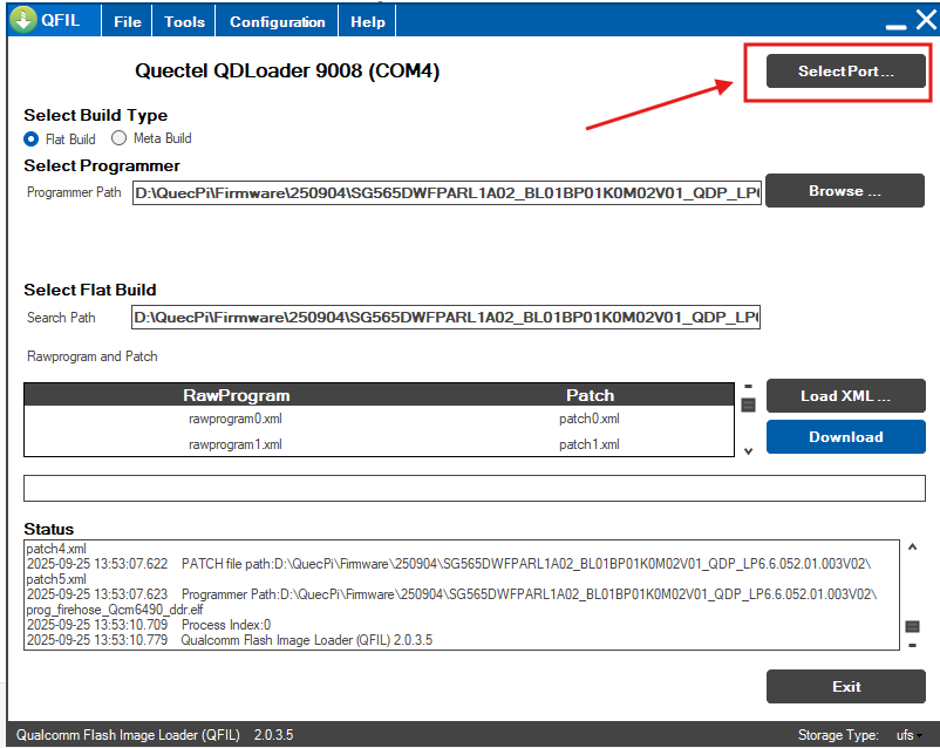
Choose the Qualcomm HS-USB QDLoader port and click OK.

Step 4: Configure Build Type
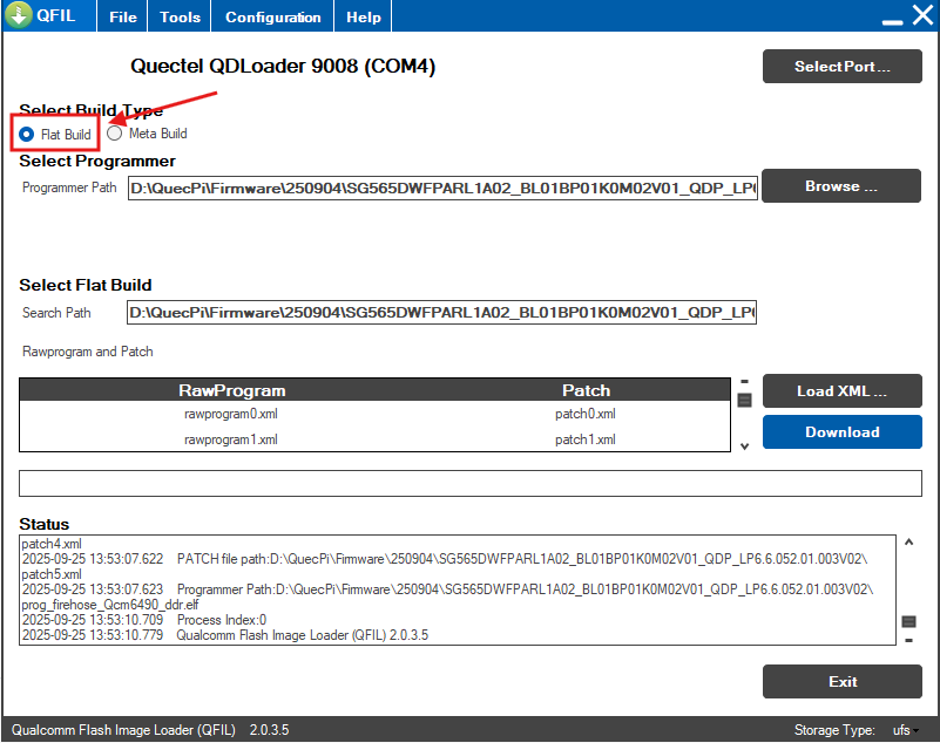
Under the QFIL main interface, select:
Build Type → Flat Build
Step 5: Load the Programmer File
Click Browse under the Programmer Path section.
Navigate to the extracted firmware package directory.
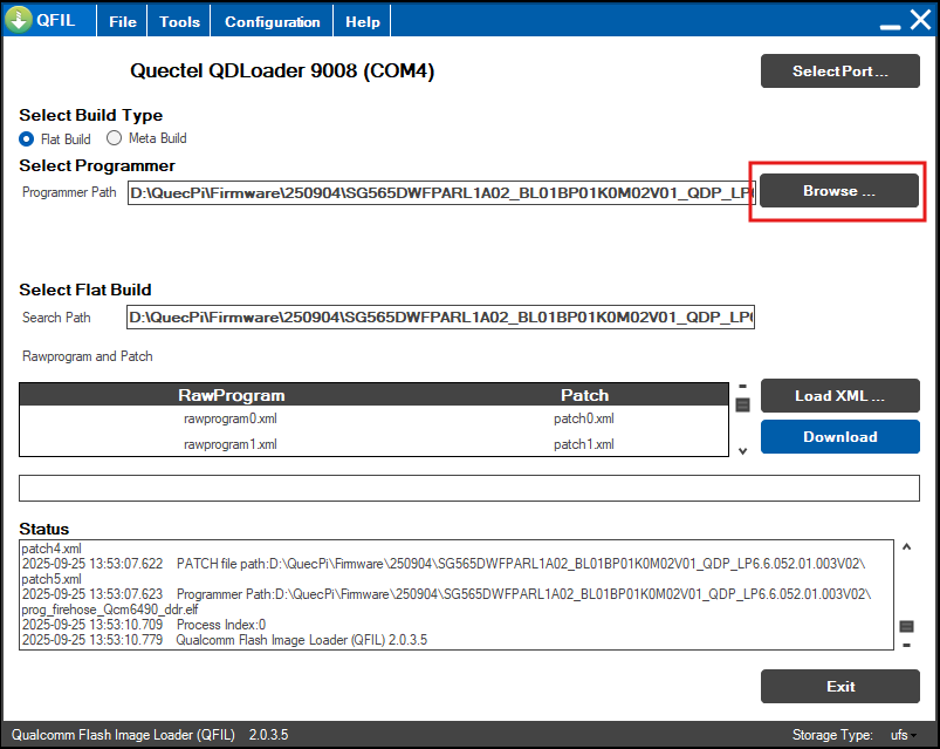
Select the programmer file (.elf) and click Open.
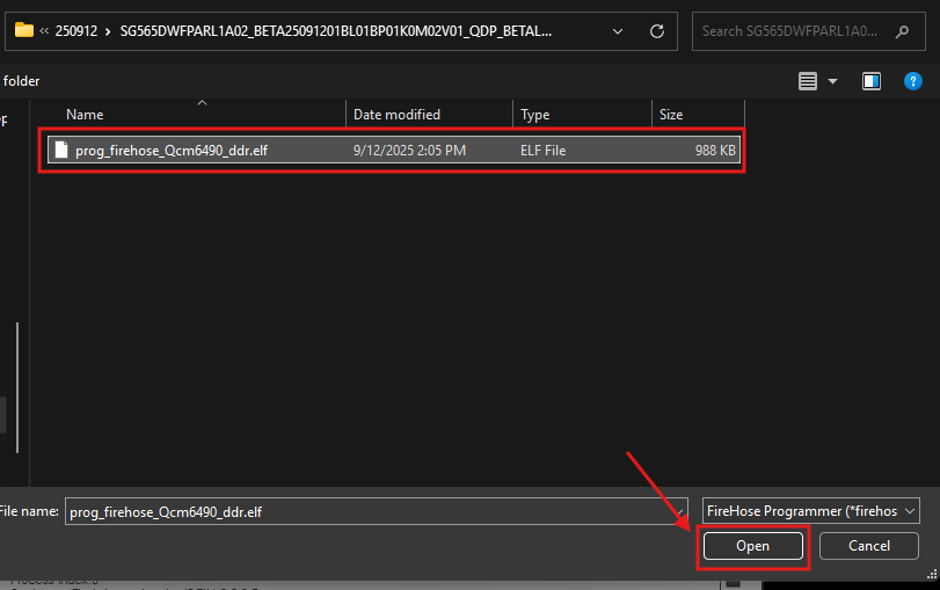
Step 6: Load Firmware XML Files
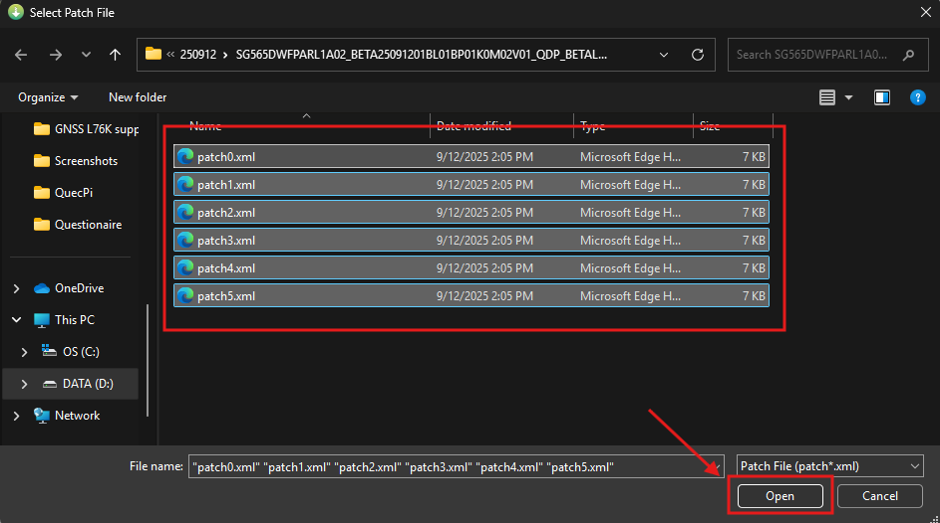
After selecting the programmer file, click on Load XML … button and it will prompt for XML files.
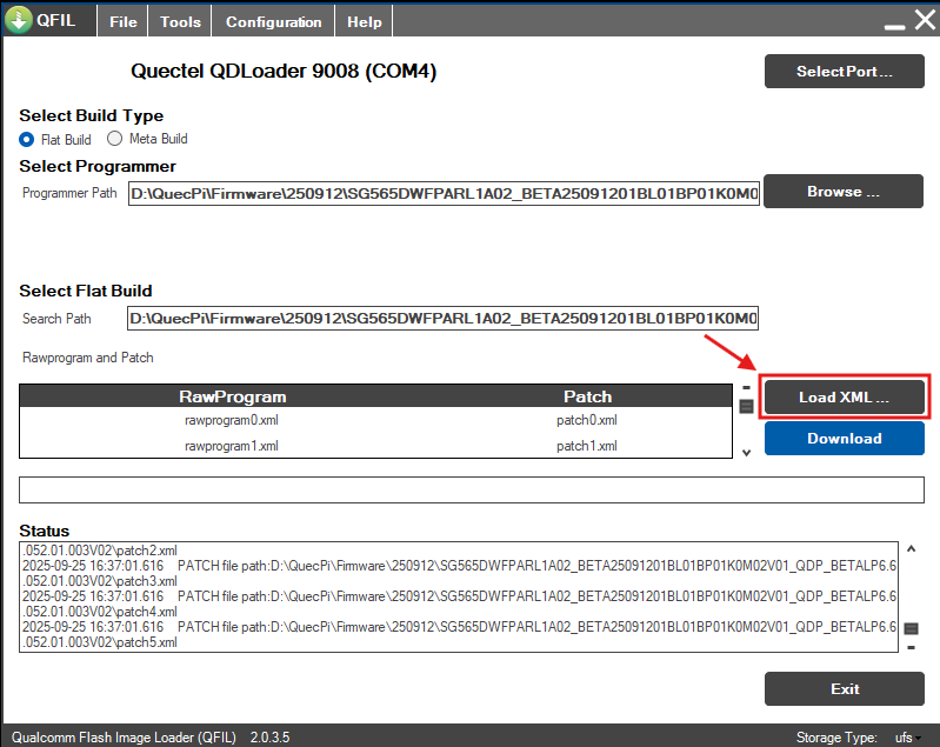
Two file selection dialogs will appear during this process.
First XML Selection
Select all available files and click Open.
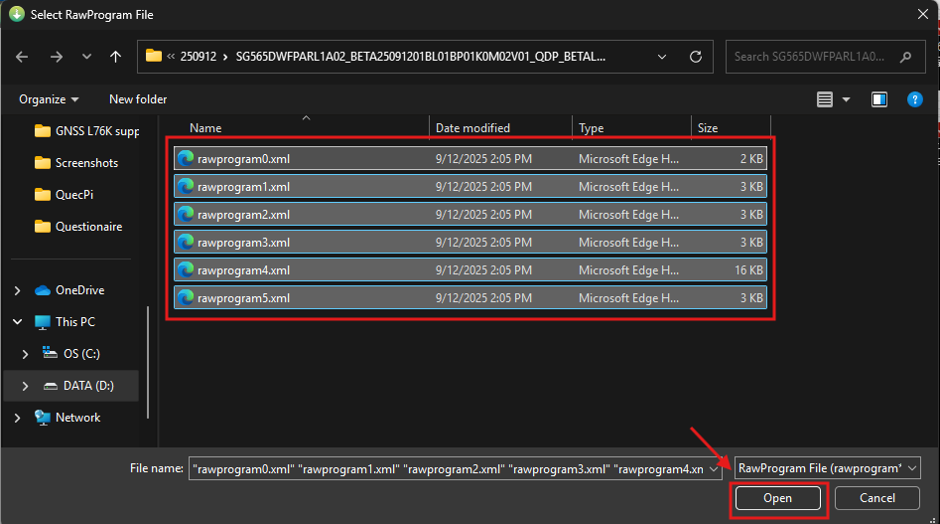
Second XML Selection
Again, select all available files and click Open.
Step 7: Verify Storage Type
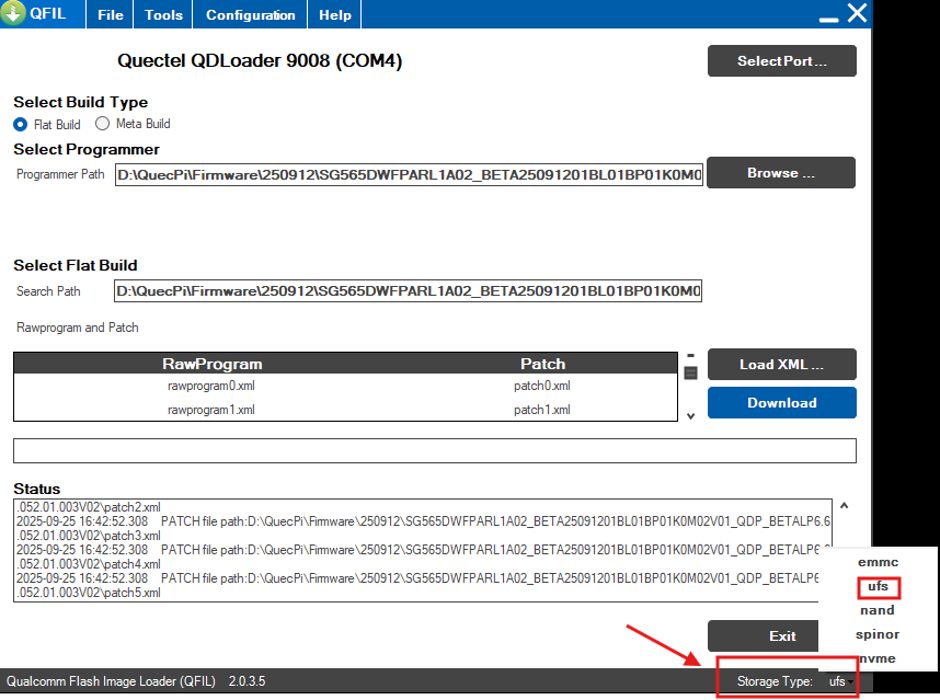
Before starting the upgrade, verify that the storage type is configured as:
UFS
If a different storage type is displayed, change it to UFS before proceeding.
Step 8: Start Firmware Download
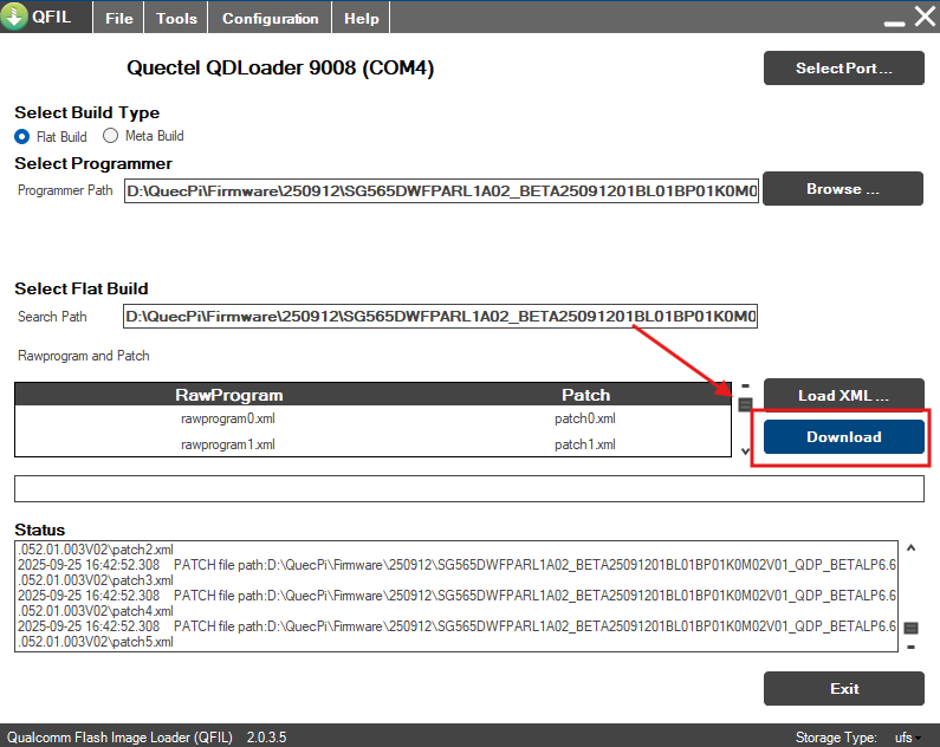
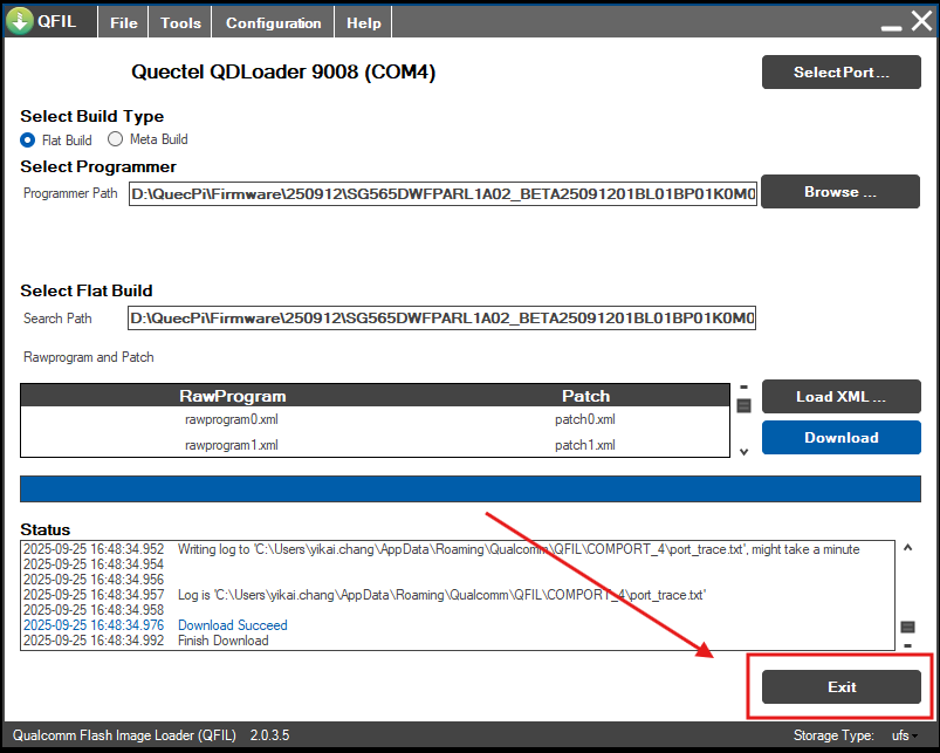
After confirming all settings are correct, click Download.
QFIL will begin transferring and flashing the firmware to the SG565D-WF.
Step 9: Monitor Upgrade Progress
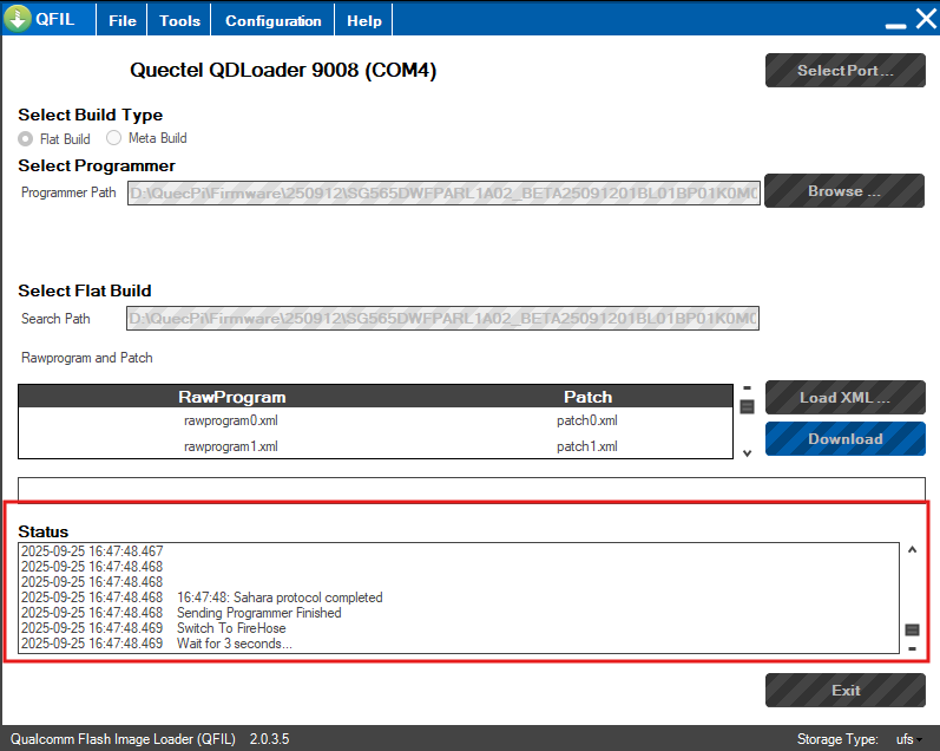
The flashing progress and status messages can be monitored from the QFIL status window.
Step 10: Verify Flashing Completion
Once the upgrade completes successfully, QFIL will display a completion message in the status window.

At this point, the firmware upgrade process is complete.
Step 11: Disconnect the Device
Close QFIL by clicking Exit.
Disconnect power from the module.
Step 12: Boot the Module Normally
Reconnect power and boot the SG565D-WF normally.
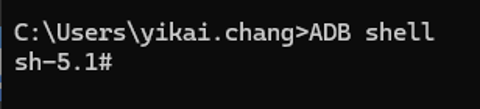
Open a terminal and connect to the device using ADB Shell.
Step 13: Verify Firmware Version
Execute the following command:
uname -a
Compare the firmware version before and after flashing to confirm that the new firmware has been successfully installed.
Before Upgrade

After Upgrade

Step 14: Upgrade Completed
If the reported firmware version matches the expected release, the upgrade has been completed successfully.
The SG565D-WF is now running the updated firmware.
Troubleshooting Tips
-
Ensure the device is in EDL mode before launching the download process.
-
Verify that the correct Qualcomm HS-USB QDLoader port is selected.
-
Confirm that the storage type is set to UFS.
-
Use the programmer (.elf) file included with the firmware package.
-
If the flashing process fails, disconnect power, re-enter EDL mode, change the cable and repeat the procedure.
For additional support, please provide:
-
Firmware package version
-
QFIL version
-
Flashing logs
-
Screenshots of any error messages encountered